In the previous two articles, we saw a first example of programming a Web API with Flask and how to connect a Web API to an SqLite database.
In what follows, we’ll look at how to build REST APIs with input and output validation and documentation automatically generated by Swagger/OpenAPI. We’ll also see how to use the API with JavaScript to update the DOM (Document Object Model), i.e. the structure of the web page displayed. The REST API we’re going to build will enable us to manipulate a directory of people, identified by their surname. Updates will be marked with a “timestamp” (date/time). The directory could be manipulated in the form of a database, a file, or via a network protocol, but to simplify things initially, we’ll use in-memory data.
One of the aims of APIs is to decouple data from the applications that use it, by making the details of data implementation transparent.
1. REST methodology
We mentioned the REST methodology in the first article. We’ll now take a closer look.
REST can be thought of as a set of conventions leveraging the HTTP protocol to provide CRUD (Create, Read, Update, Delete) tools acting on entities or collections of entities over the internet.
CRUD can be mapped to HTTP in the following way:
2. Ce que REST n’est pas
Because the REST methodology is so useful and helps to fine-tune the way you interact with an API, it is sometimes misused, for problems to which it is not suited.
In many cases, we want to perform an action directly. Let’s take the example of substituting a string.
Here is an example of a URL allowing a priorito do this:
/api/substituteString/<string>/<search_string>/<sub_string>
- First problem: the URL doesn’t point to a single resource, so what it returns depends entirely on the path specified.
- Second problem: No CRUD concept matches this URL.
- Third problem: The meaning of the path variables depends on their position in the URL.
In the following example, we’re going to develop a REST API to access a directory of people and perform CRUD operations on it.
Here’s the API design:
templates/home.html
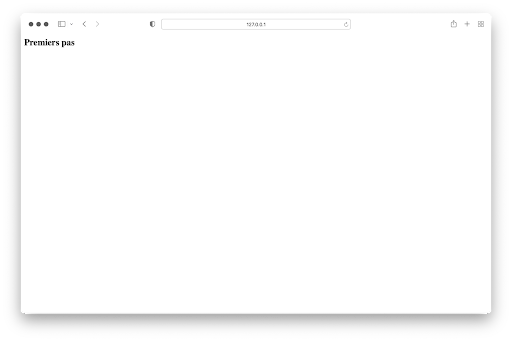
We’re going to start by creating a very simple web server using the Flask development framework.
We create a directory api, a subdirectory version_1, then a subdirectory templatesor save the following programs:
server.py.We’ll start by creating a very simple web server using the Flask development framework.
We create a directory api, a subdirectory version_1, then a sub-catalogue templatesor save the following program:
server.py.
4. Connexion
Now that we have a working Web service, we can add a REST API endpoint. To do this, we’ll install the Connexion module.
To do this, type the following in a terminal window (assuming you are working under Anaconda):
conda install -c conda-forge connection
You can now import it into Python.
Next, create a version_2 subdirectory in the api directory and save the following programs there:
server.py
swagger.yml
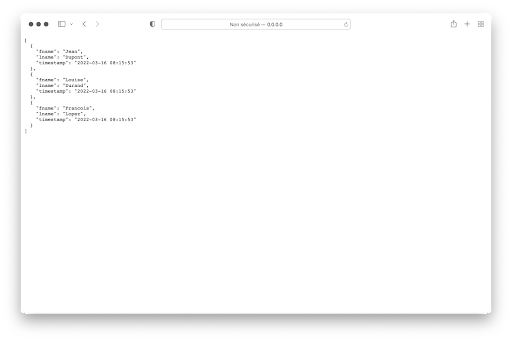
In the module people. py first appears the get_timestamp( ) function, which generates a representation of the current date/time in the form of a string. It is used to modify data when a change request is passed to the API.
Next, we define a PEOPLE dictionary which is a simple database of names, having the surname as the key.
PEOPLE is a module variable and its state therefore persists between API calls.
In a real application, PEOPLE data would reside in a database, file or web resource, i.e. it would persist regardless of application execution.
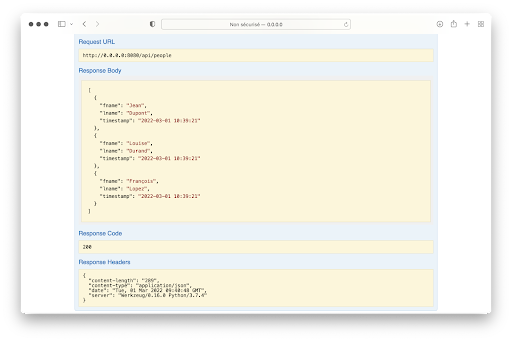
Then comes the read( ) function, which is called when the server receives an HTTP GET request for /api/people.
The return value of this function is converted to JSON format (as specified by produces: in the configuration file swagger. yml).
This consists of the list of people sorted alphabetically by surname. At this point, we can run the program server.py using the command:
$ python server.py
which gives the following result by entering as address http://0.0.0.0:8080/api/people in the browser bar:
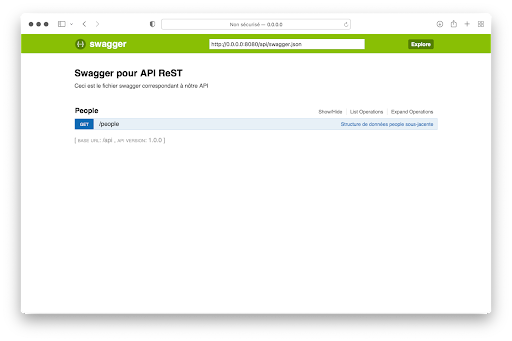
5. Swagger/OpenAPI
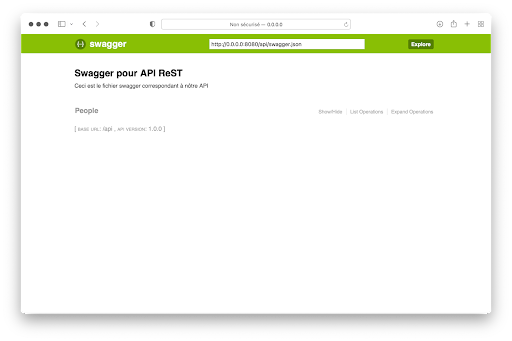
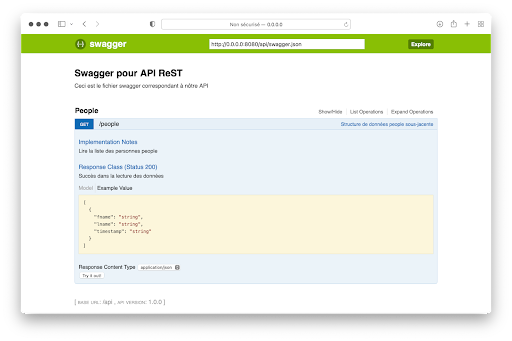
Click on People to display the potential query:
When you click on the request, the interface displays the following additional information:
The structure of the response
The format of the response (content-type)
The text entered in swagger.yml about the request
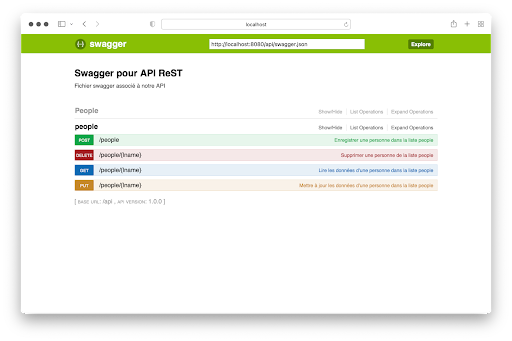
6. Full API
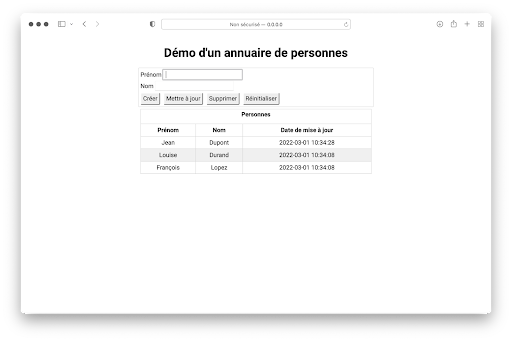
7. Web application
8. Références bibliographiques
- Creating Web APIs with Python and Flask, Patrick Smyth, 2022 :https://programminghistorian.org/en/lessons/creating-apis-with-python-and-flask.
- Python REST APIs With Flask, Connexion, and SQLAlchemy, Doug Farrell, 2022 : https://realpython.com/flask-connexion-rest-api/.
- Python REST APIs With Flask, Connexion, and SQLAlchemy, Doug Farrell, 2022 : https://realpython.com/flask-connexion-rest-api-part-2/.
- Flask RESTful documentation, 2020 :https://flask-restful.readthedocs.io/en/latest/index.html.
- Flask Web Development : Developing Web Applications with Python (2nd edition). M. Grinberg. O’Reilly 2018.
- Architectural Styles and the Design of Network-Based Software Architectures. T. Fielding. Thesis, University of California, 2000.


