This is the second part of a series
Motivation
The previous article discusses the complexities of the machine learning life cycle and how Vertex Pipelines, a managed version of Kubeflow on Google Cloud, can address operationalizing a machine learning model. The next step in the journey is to automate the training and deployment of the system in a manner that facilitates and enables reproducibility and time to market. In traditional software development, this capabilities would be enabled by a system that allows for
- Continuous Integration (CI) – the ability to test and validate checked in code that needs to be merged into a central repository
- Continuous Deployment (CD) – Creating and deploying the system to an appropriate environment
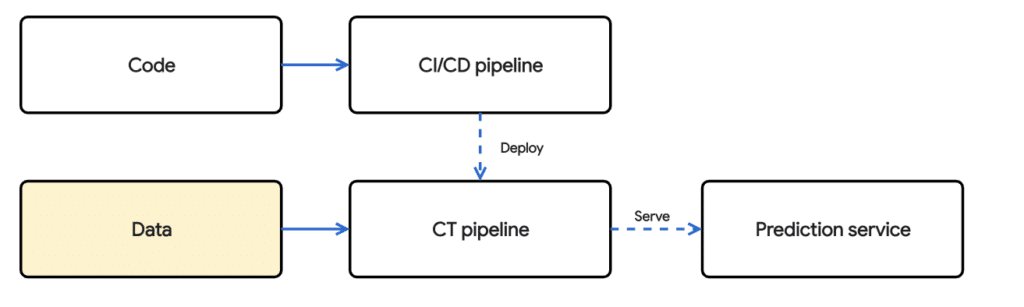
Since machine learning models are dependent on the data, it must be accounted for in the CI/CD process. Particularly,
- Data must be tested and validated for quality and training/serving skew
- A model must be continuously trained on new data to account for changes in the world
- The model must be validated, tested and deployed to a prediction service
This also introduces the notion of continuous training. Depending on the use case, we need our model to be trained and updated on a frequency.
Purpose
The goal of this article is to serve as a gentle introduction to CI/CD for the Vertex Pipelines created in the previous article. To address all the components in a comprehensive CI/CD workflow in the image above would go beyond the scope of a short blog. This article assumes the reader has foundational knowledge on concepts surrounding git, docker, and cloud technologies.
What is Cloud Build ?
Cloud build is a fully managed, serverless CI/CD platform. Other potential include Jenkins, Azure DevOps and Github Actions. A CI/CD platform allows for teams to effectively and iteratively develop and ship software to different environments. This tutorial will use Google Cloud Build alongside a github repository to build and run containers using the code that was pushed to a main branch.
A Minimalistic CI/CD/CT Workflow
Prerequisites
- A github account and repository
- This article assumes the reader has some foundational knowledge in git. https://www.atlassian.com/git/tutorials/setting-up-a-repository
- Google cloud environment
- If you are new to Google Cloud, refer to this page to get started. In this example, we are going to be developing our pipeline on a Vertex AI Notebook.
Recall from the previous post, that the goal was to build an end-to-end ML workflow where
- A model is trained
- Evaluated against a metric
- Deployed to a computer endpoint where predictions can be made
Note that in some instances, the deployment workflow may be separate from the training workflow. For example, you may want your machine learning model to be trained on a weekly basis but go through an extensive quality assurance process before deploying.
Rewrite our pipeline workflow
The first thing we will need to do is transform the python notebook file (.ipynb) into a normal python file (.py). This python file contains all the executable code to recreate a compiled pipeline file that will actually be used to execute our machine learning workflow. This is because python files work much better with text files than with mixtures of text and binaries, which is what notebook files are. Refer to the github repository here for the full code.
Create a Dockerfile
The next step is to create a Dockerfile that contains our python file pipeline.py and our requirements.txt. Note that we are creating a separate folder (./kpi-cli) within our workspace to house the files for our docker image.
					%%writefile kfp-cli/Dockerfile


FROM gcr.io/deeplearning-platform-release/base-cpu
WORKDIR /kfp-cli
ADD pipeline.py ./pipeline.py
ADD requirements.txt ./requirements.txt
RUN pip install -r requirements.txt
CMD python ./pipeline.py
Build a local image and push it to Container Registry
Now that a Dockerfile is defined and the dependencies exist within a directory, create a local image and push it to Artifact Registry.
					IMAGE_NAME='kfp-truiz-mlops-v2'
TAG='latest'
IMAGE_URI='gcr.io/{}/{}:{}'.format(PROJECT_ID, IMAGE_NAME, TAG)


!gcloud builds submit --timeout 15m --tag {IMAGE_URI} ./kfp-cli
The cloudbuild product page within the console will contain the information on the build.
Build a cloudbuild.yaml file
The next step is to create the cloudbuild.yaml file. This yaml file will contain the steps to execute the build when code gets pushed to the remote repository. For more information on creating the cloudbuild, refer to the documentation.
In short, this will do a few things
- Build the docker image using the code in the repository. If there are errors in code, this build step will fail
- Push the most recent version of the docker image back to Artifact Registry
- Use the image that was created to run the python script in the repository. The output of this execution will be the pipeline yaml file
- The next step is to write the pipeline yaml file to a google cloud storage bucket. This yaml file can then be picked up by a scheduler to trigger the pipeline.
					steps:
  # Step 1: Build the Docker image
  - name: 'gcr.io/cloud-builders/docker'
    args: ['build', '-t', 'gcr.io/$_PROJECT_ID/kfp-truiz-mlops-v2:latest', './kfp-cli']

  # Step 2: Push the image back to container registry
  - name: 'gcr.io/cloud-builders/docker'
    args: ['push', 'gcr.io/$_PROJECT_ID/kfp-truiz-mlops-v2:latest']

  # Step 3: Run the Python file within the container
  - name: 'gcr.io/$_PROJECT_ID/kfp-truiz-mlops-v2:latest'
    args: ['python', './kfp-cli/pipeline.py']
    env:
    - 'PROJECT_ID=$_PROJECT_ID'
    - 'REGION=$_REGION'

  # Step 4: Write results to Google Cloud Storage
  - name: 'gcr.io/cloud-builders/gsutil'
    args: ['cp', './xgb-pipeline.yaml', 'gs://$_PROJECT_ID-cloudbuild-pipelines']

options:
    logging: CLOUD_LOGGING_ONLY

substitutions:
   _PROJECT_ID: '<PROJECT_ID>'
   _REGION: 'us-central1'
Submit a local job to the Cloud Build
Once the docker file is defined and the cloudbuild yaml created, a local build can be submitted using gcloud command line interface. This:
!gcloud builds submit ./kfp-cli --config cloudbuild.yaml
Connect Google Cloud to our Github Repository
Now that the cloudbuild file is defined, there needs to be an integration between the cloudbuild environment and the git repository. Fortunately this is pretty simple and straightforward to set up via the console.
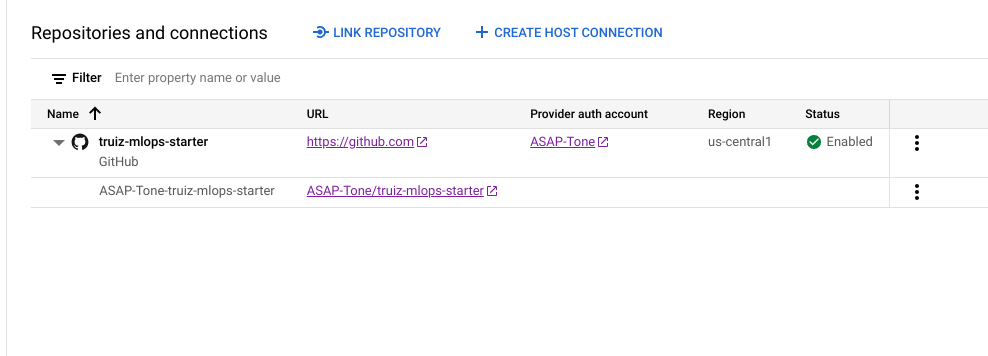
The first step is to create a host connection to the git environment. This will in turn handle the authentication mechanism to the repository. You will be redirected to your github repository to allow the connection. An authentication token from GitHub will be created and stored in this project as a Secret Manager secret. You may revoke access to Cloud Build through GitHub at any time.
The second step is to link the repository. You will need to install the Google Cloud build application within Github to allow the integration to the selected repository.
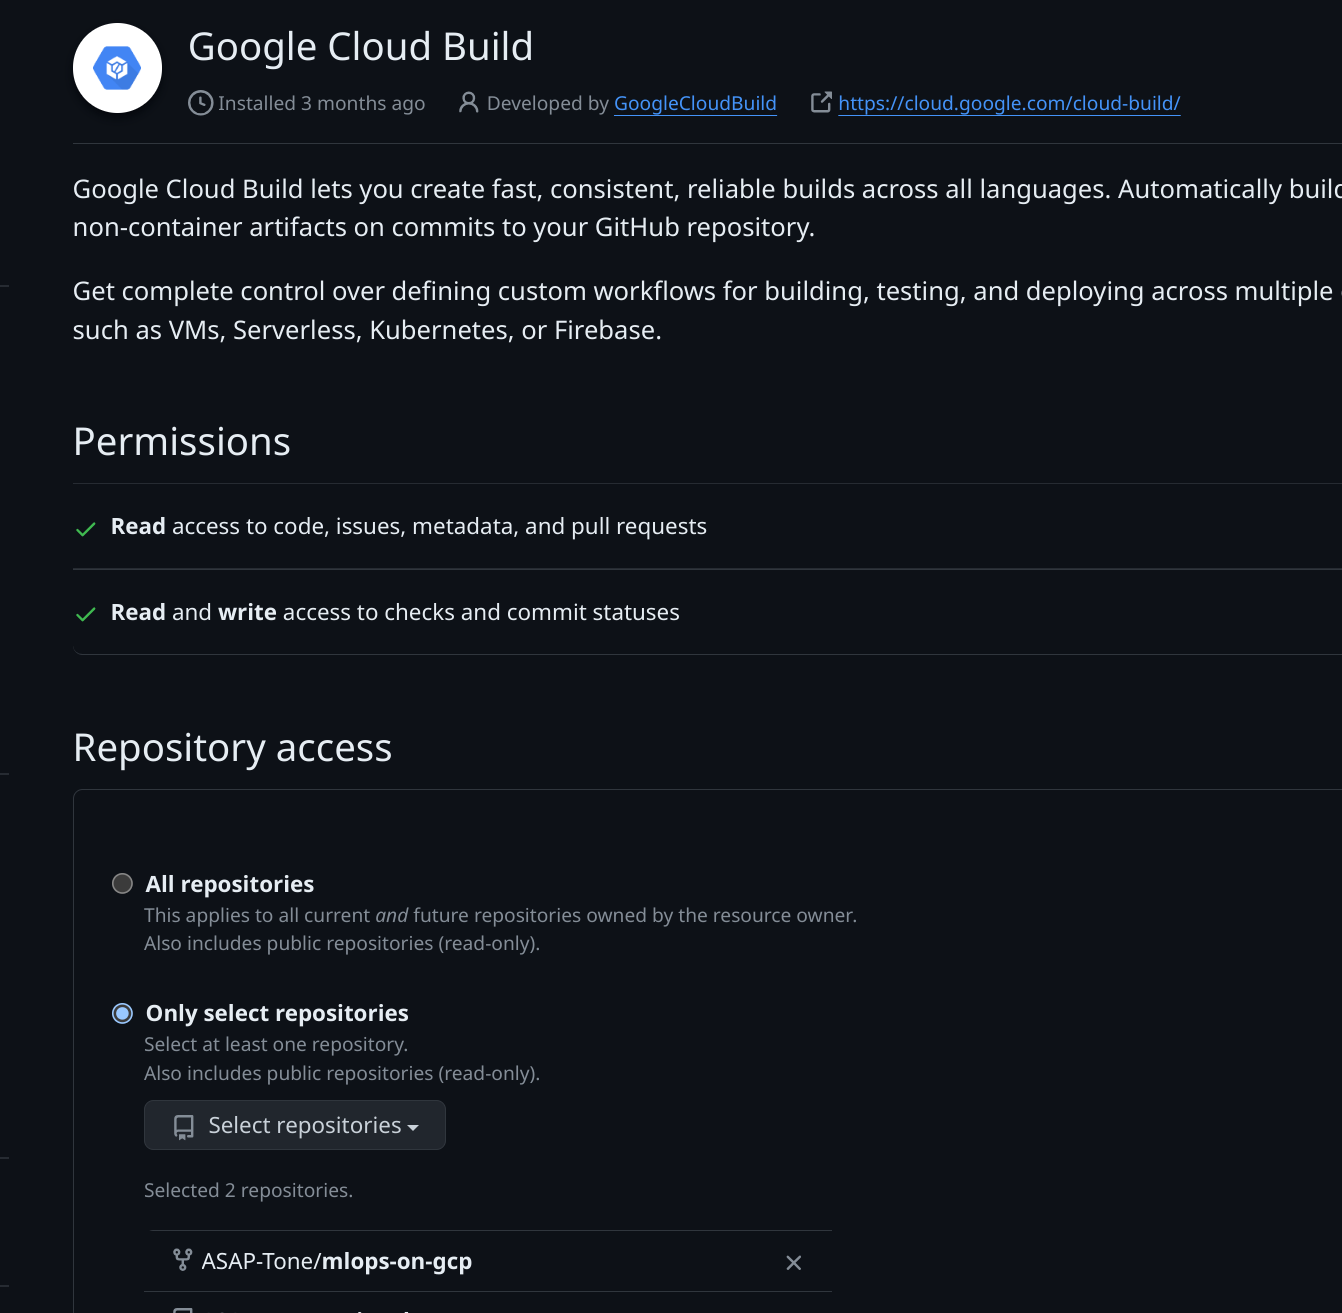
After that step is complete, you will be able to link the repository to your Google Cloud Build host connection.
Create a Cloud Build Trigger
https://cloud.google.com/build/docs/automating-builds/create-manage-triggers
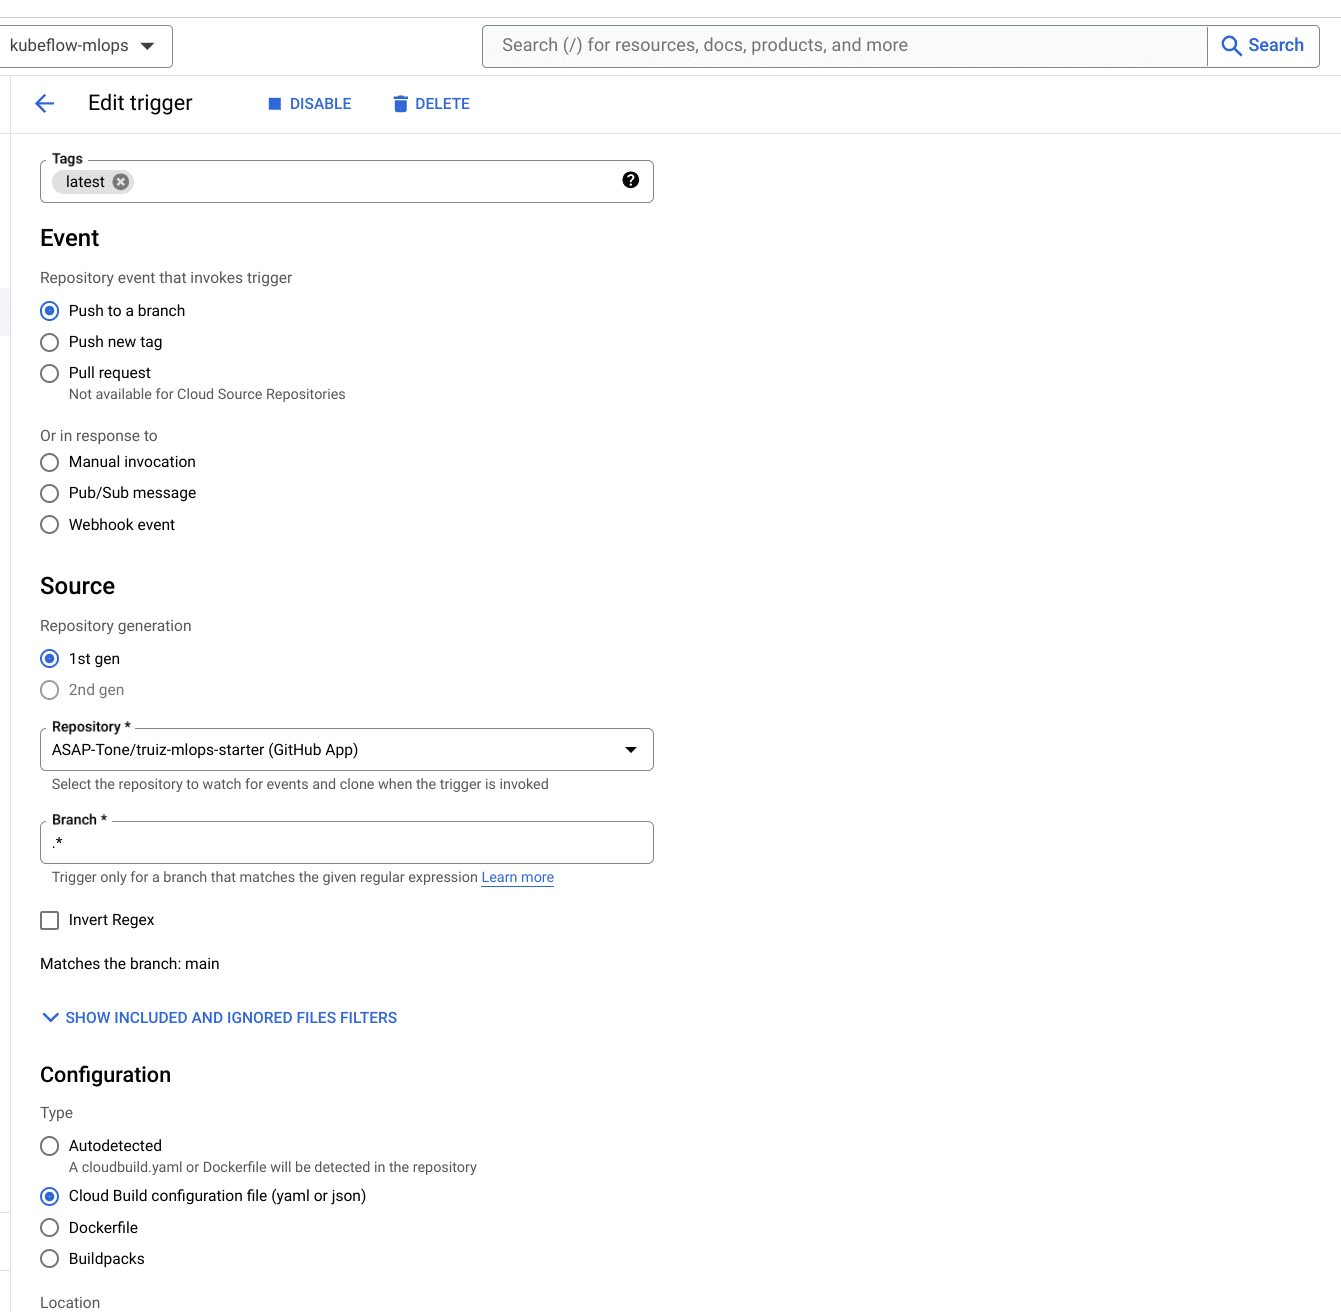
Now every time a push is made to the main branch, a build process will kick off. This is done through Cloud build triggers, which allow the user to trigger specific actions on connected repositories. In the image below, a trigger is created to execute a build every time there’s a push to a new branch. Note that specific branches can be defined using regex. The cloudbuild.yaml file is also specified as the configuration for the build.
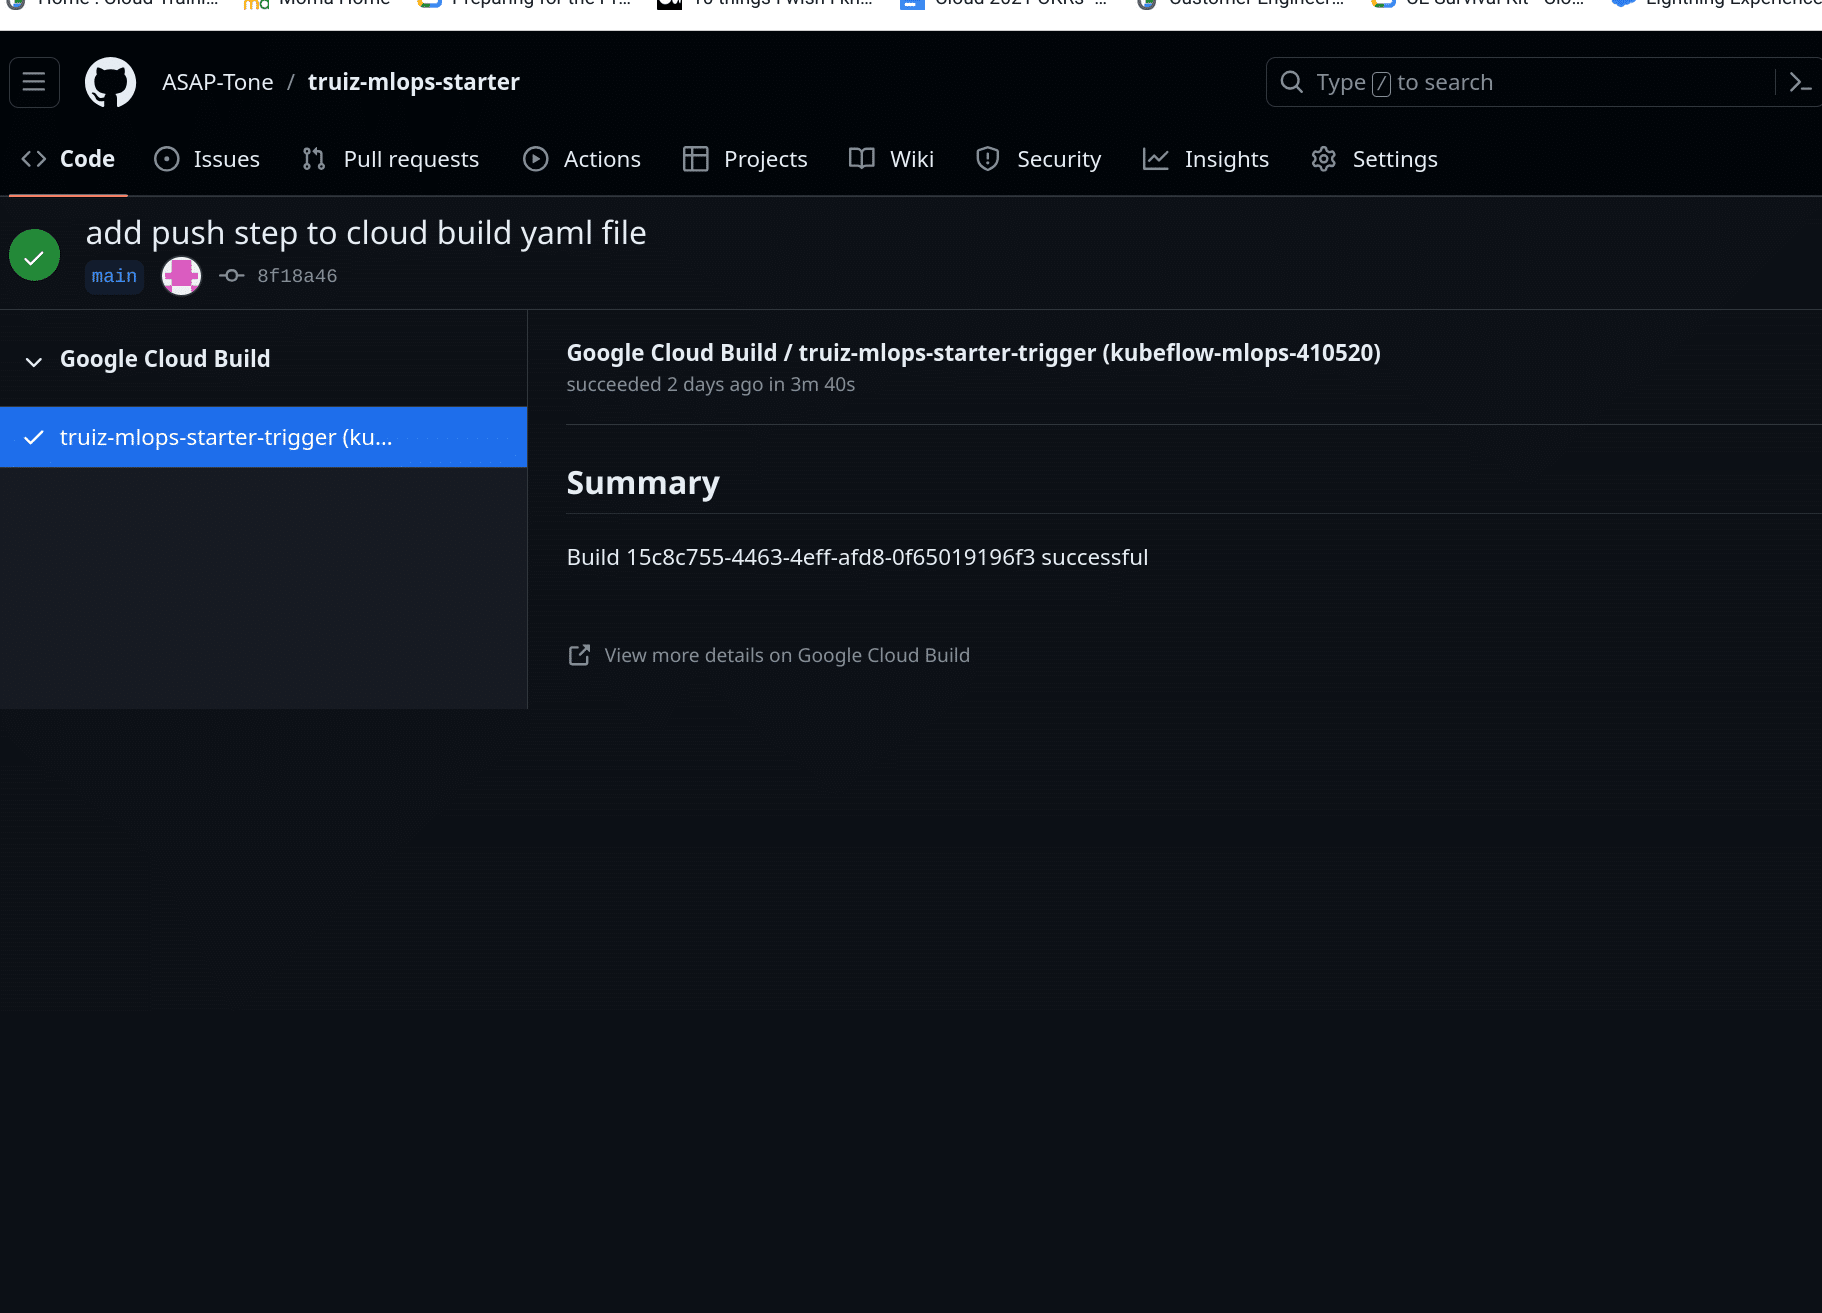
Once the connection to the remote repository is established and a trigger is created, the next step is to push a commit to the remote repository. This will execute a build on the environment within the remote git repository. The changes that were pushed to the folder will be used to create a new image, push it to the container registry, run the pipeline file, and move the compiled pipeline specification to storage. All that is needed now is to execute the pipeline using a scheduler or an event.
Configure a schedule to execute Pipeline
The next step is to actually execute the pipeline file. How this is done can vary depending on the use case.
- We may want to execute a scheduled training pipeline weekly, and deploy our model only when a model artifact has made it up the proper approval channels.
- We may want to retrain a model after a batch process is complete. For example, when data in our data warehouse gets updated, a trigger would occur that trains the model.We can schedule a recurring schedule with the Scheduler API or we can create an event driven workflow using a messaging/queue service like Pub/Sub. For our use case, a weekly batch process will suffice.
					pipeline_job = aiplatform.PipelineJob(
    template_path=COMPILED_PIPELINE_PATH,
    pipeline_root=PIPELINE_ROOT_PATH,
    display_name="xgb-pipeline",
)

pipeline_job_schedule = pipeline_job.create_schedule(
    display_name="weekly_training_and_deployment",
    cron="30 18 * * 6",  # weekly 6pm UTC time on Saturday
    max_concurrent_run_count=1,
    max_run_count=1,
)
Conclusion
Congratulations, this article covered a lot of ground. We went from training a machine learning model through a manual process to automating the training, deployment and integrating our workflow with a code repository. This article did not cover an extensive list of all that can be done in a CICD workflow. For example, a more mature pipeline would handle things like unit tests, deployment to different environments, testing the data for training/serving skew, and so forth, however, it did demonstrate a starting point to work towards those capabilities.
References :
- https://medium.com/google-cloud/enterprise-mlops-with-google-cloud-vertex-ai-part-3-ci-cd-33d5e6e774a7
- Architecture for MLOps using TensorFlow Extended, Vertex AI Pipelines, and Cloud Build
- https://medium.com/google-cloud/how-to-implement-ci-cd-for-your-vertex-ai-pipeline-27963bead8bd
- https://medium.com/google-cloud/how-to-implement-ci-cd-for-your-vertex-ai-pipeline-27963bead8bd


