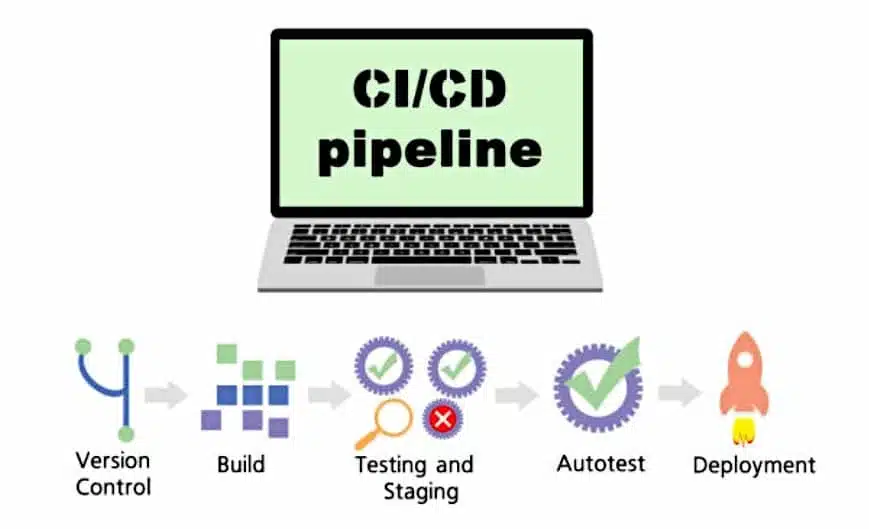
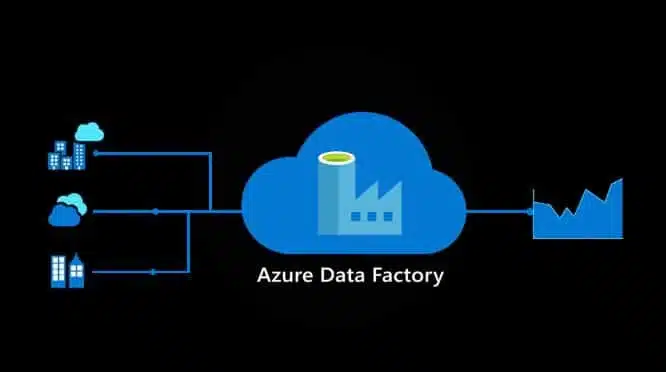
Azure DevOps pipelines facilitate CI/CD (Continuous Integration and Continuous Delivery) for Azure Data Factories. Explore how to transition updates from a development setting to testing and production environments!
Data Engineers craft and establish pipelines within a Development setting before migrating them to a Testing environment. Post-testing, the pipelines are ready for Production deployment. The primary aim of this approach is to identify bugs, data quality issues, or missing data.
This distinct separation of environments ensures a division of responsibilities and minimizes the influence of alterations made through other epics. It mitigates risks and outages while enabling the confinement of security and permissions specific to each environment, thus averting human errors and protecting data integrity.
This distinction emphasizes the necessity of having separate development, testing, and production environments. Implementing CI/CD (Continuous Integration and Continuous Delivery) further aids by automating administrative tasks and reducing technical risks.
Integrating automation in testing and deployment guarantees the consistency of actions every time. CI/CD pipelines incorporated into the development workflow permit systematic and automated testing and deployment of data pipelines.
This article guides you on how to set up an Azure DevOps repository for your Data Factory and utilize Azure DevOps pipelines to propagate updates across different environments.
Why Implement CI/CD for Azure Data Factory?
Per Microsoft’s definition, continuous integration is the automated and early-stage testing of every codebase change. Continuous delivery follows this testing phase in the continuous integration process and oversees the transition of updates to a staging or production environment.
Within Azure Data Factory, continuous integration and delivery (CI/CD) means the migration of Data Factory pipelines from one phase (development, test, production) to another.
The objective is to rigorously test developments within Data Factory, employing varied separate environments for simplified transitions between these stages to create a reliable and maintainable Data Engineering platform.

What Are the Prerequisites?
Several elements serve as prerequisites for this workflow. An Azure cloud subscription is vital, with provisions to create resource groups and resources under the “Owner” role designation.
Without the corresponding role privileges, establishing a service principal, to secure access to Data Factories within the resource group, is impossible.
Along with building the Azure Data Factory and configuring DevOps pipelines. For demonstration purposes, we’ll prepare all necessary resources for three environments: DEV, UAT, and PROD.
Configuring the Azure Environment
We’ll start by creating three resource groups and Data Factories using the Azure Portal. Each resource group name needs to be a unique identifier within the subscription, and these Data Factories should have distinctive identities within the Azure cloud.
This tutorial adheres to this naming pattern: “initials-project-environment-resource”. For further insight on naming conventions, Microsoft’s official documentation is available.
Create three Resource Groups named: <Initials>-warehouse-dev-rg <Initials>-warehouse-uat-rg <Initials>-warehouse-prod-rg
In the Azure portal, select “create a resource” at the top of the homepage. Use the search bar to find “Resource Group” and select it from the results.
Navigate to the “Resource Group” page and click “Create.” Populate three fields on the “Create a resource group” page:
- Subscription: Choose your subscription from the menu
- Resource Group: “<Initials>-warehouse-dev-rg”
- Region: Select the geographically closest region
Finalize by clicking “Create” at the bottom of the screen. Repeat this procedure to establish the UAT and PROD Resource Groups by changing only the group name on the creation pages. You’ll now find these three Resource Groups in your Azure portal.
Next, we’ll set up Data Factories for each Resource Group, following this structure: <Initials>-warehouse-dev-df <Initials>-warehouse-uat-df <Initials>-warehouse-prod-df
Remember, Data Factory names must be unique across the Azure cloud. It might be necessary to add a random numeral at the end for differentiation.
For the DEV Data Factory, select “Create a Resource” from the top of the Azure home page. Search for “Data Factory” and select it from the results.
Click “Create” on the “Data Factory” page. Populate five fields:
- Subscription: Choose your subscription from the drop-list
- Resource Group: Select “<Initials>-warehouse-dev-rg”
- Region: Pick the nearest Region
- Name: “<Initials>-warehouse-dev-df”
- Version: V2
Select “Next: Git configuration” at the bottom of the page. Opt for “Configure Git later”, then click “Create” to finalize.
The same creation process applies for the UAT and PROD Data Factories by updating the name and relevant Resource Group.
Upon completion, each Resource Group will accommodate a Data Factory. The Data Factory environment should correspond with the Resource Group.

Establishing the DevOps Environment
The following step involves setting up a repository with the Azure Data Factory code and pipelines. Access the Azure DevOps website and click “sign up for Azure DevOps” below the “Get started for free” button.
Log in using your Azure credentials. At the directory confirmation stage, refrain from hitting “Continue” just yet. The approach varies based on your account type.
For a personal Azure and DevOps account, switch directories while logging in to link Azure Services to DevOps. After signing in, select “change directory” beside the email and opt for “default directory,” then proceed by clicking “Continue.”
If a corporate account is in use, it’s already linked to a directory; thus, you can directly click “Continue.” On the “Create a project to start” screen, the system generates an organization name automatically in the top left corner.
Before project creation, ensure the DevOps organization connects correctly to Azure Active Directory via the “Organization settings” found at the top left. In the sidebar, access “Azure Active Directory” to confirm the used account for Azure Services.
You may now generate the project, naming it “Azure Data Factory” while keeping visibility private, selecting “Git” for version control and “Basic” for “work item process”. Click “Create project.”
Following this step, you’ve formed a DevOps organization and a project harboring the Azure Data Factory code repository. Now, on the project home page, the next task is linking the DEV Data Factory to the DevOps repository.
Only the DEV Data Factory is added to the repository, serving as the DevOps release pipeline for code transitions to UAT and PROD.
In the Azure portal, navigate to the DEV Resource Group and select DEV Data Factory. Initiate “configure a code repository” from the homepage.
On the “repository configuration” panel, complete these fields:
- Repository type: Azure DevOps Git
- Azure Active Directory: Choose your Azure Active Directory
- Azure DevOps Account: Select the organization created earlier
- Project Name: Azure Data Factory
- Repository Name: Opt for “use an existing repository,” choose “Azure Data Factory” from the menu
- Collaboration branch: master
- Publish branch: adf_publish
- Root folder: Retain default root “/ “
- Import existing resource: Leave unchecked, as this Data Factory is fresh with no content.
Confirm the setup and ascertain connectivity between your Data Factory and the repository. On the left sidebar, click “Author.” When selecting a working branch, choose “Use an existing branch” and “master,” then save.
Under “Factory Resources,” click “+” and opt for “new pipeline.” Term it “wait pipeline 1” and insert a “Wait” activity onto the pipeline canvas. Hit “Save All” atop the screen followed by “Publish” and “OK.”
Navigate to the Azure Data Factory project in DevOps and select “Repos.” You should see the pipeline created therein.
The repository holds two branches. The master branch, originating with the repository, encapsulates all Data Factory elements, including datasets, integration runtimes, linked services, pipelines, and triggers, each tied to a .json file detailing its properties.
The automatically generated adf_publish branch on publishing “wait pipeline 1” hosts two crucial files enabling the transition of the DEV Data Factory code to UAT and PROD.
The ARMTemplateForFactory.json file documents all assets and properties within the Data Factory, while the ARMTemplateParametersForFactory.json file specifies all used parameters within the DEV Data Factory.
Now, having established the resources and connections, you can proceed to create the pipeline. It facilitates releasing the adf_publish branch content to UAT and PROD.

Creating an Azure DevOps Pipeline
The pipeline’s central function is capturing the adf_publish branch. This branch maintains the latest DEV Data Factory version, subsequently deployable across UAT and PROD Data Factories.
Every release mandates executing the “pre and post-deployment” PowerShell scripts. Without these scripts, any DEV Data Factory pipeline deletions won’t register during UAT and PROD deployments.
Access this script in the Azure Data Factory documentation’s footer. Save it as a PowerShell file using your preferred code editor.
In Azure DevOps, click “Repos” in the left panel. In the adf_publish branch, hover over the DEV Data Factory folder, click “ellipses”, then “Download files,” and ascertain the desired file location for download. Validate the process. You should now find a “.ps1” file extension in the adf_publish branch.
Next, build the CI/CD Azure Pipeline. On the DevOps page’s left side, go to “Pipelines” and select “Create Pipeline”.
The following page offers an option to “Use the classic editor,” providing a visual overview of the ongoing process steps. Once finalized, you can examine the YAML code produced.
This pipeline ties to the adf_publish branch, wherein the ARMTemplateForFactory and ARMTemplateParametersForFactory .json files are housed.
At the source selection interface, pick Azure Data Factory as the team project and repository, with adf_publish as the default branch, then “Continue.”
We will now transfer the DEV Data Factory folder contents under the adf_publish branch located in “Repos” > “Files.” Adjacent to “Agent job 1,” click the “+” symbol. Search “Publish artifacts” and add it to the task list.
Under “Agent job 1,” selecting “Publish Artifact: drop” provides extra options on the page’s right side. Modify the “Publish path”: click the ellipsis and select “<Initials>-warehouse-dev-df” from the folder menu. Press “OK.”
Above the pipeline, choose “Triggers” and ensure “Enable continuous integration” is checked, with “Branch specification” set to “adf_publish.”
Enabling this setting for the pipeline facilitates automated capturing and applying the latest DEV Data Factory state upon user publishing of new components. Hit “Save and Queue,” then “Save and run.”
Upon choosing “Agent job 1”, you gain insight into the underlying processes. Once the job concludes successfully, go to “Pipelines” on the left. You’ll spot the newly made pipeline, along with its status and recent modifications.
Establishing a DevOps Release Pipeline for CI/CD
The release pipeline leverages the preceding pipeline’s output for UAT and PROD Data Factory transfers.
On the DevOps site, under “Pipelines” click “Releases,” then select “New Pipeline” and rename the stage to “UAT”. Hit “Save” in the upper-right, and confirm.
Upon UAT stage creation, include the artifact: the previously made pipeline ensconcing transferable configurations between stages.
Within the release pipeline, click “Add an artifact.” In the “Add an artifact” panel, simply click “Add.”
Proceed by adding tasks to the UAT stage within the “new release pipeline.” At the pinnacle of the pipeline, switch to “Variables”. Set variables ResourceGroup, DataFactory, and Location for automatic task parameterization during transitions.
Click “Add” to create the three pipeline variables, ensuring the location matches that of the Resource Groups and Data Factories.
Save changes and enter pipeline view. Click “1 job, 0 task” on the UAT box, then the “+” button next to “Agent job.” Search “Azure PowerShell” and add it from the list, titled “Azure PowerShell script: pre-deployment”.
Select your Azure Subscription and create a Service Principal within the UAT Resource Group, later adding it to the PROD Resource Group.
Carefully select your Azure subscription from the list during “Service Principal Authentication.” Avoid directly selecting “Authorize,” choosing “advanced options” instead.
Ensure “UAT Resource Group” is picked for the “Resource Group” in the pop-up, and hit “OK.”
Leave “Script file path” unchanged while selecting “Script Type.” Click the ellipsis next to “Script Path” to pick the saved PowerShell script. Confirm by clicking “OK.”
We will employ the “Script Arguments” presented in Azure Data Factory documentation. For pre-deployment, the arguments are “-armTemplate \” $(System.DefaultWorkingDirectory)/<your-arm-template-location>\” -ResourceGroupName <your-resource-group-name> -DataFactoryName <your-data-factory-name> -predeployment $true -deleteDeployment $false”. Ensure correct location within artifact drop, pick UAT Resource Group for the environment, set Data Factory name as UAT’s, selecting “Latest installed version” for Azure PowerShell version. Save.
Include another task; click “+,” search “ARM Template,” and add “ARM Template Deployment.” Modify to “ARM Template Deployment: Data Factory,” linking it to the previous Service Principal.
Complete remaining fields:
- Subscription: Select your subscription
- Action: create or update a Resource Group
- Resource Group: Employ the Resource Group variable formatted previously
- Location: Use the Location variable
- Template location: Referenced Artifact
- Template Parameters: Utilize the ARMTemplateForFactory.json file
- Template parameter overrides: Replace “factory name” with the Data Factory variable
- Deployment mode: Incremental

Then add an Azure PowerShell task named “Azure PowerShell Script: Post-Deployment.” Compared to the pre-deployment arguments, only replace “-predeployment $true” with “-predeployment $false” and “-deleteDeployment $false” with “-deleteDeployment $true.”
Now, grant the Service Principal access to the PROD Resource Group before starting to create the PROD stage of the release pipeline. Go to the Azure portal, navigate to the UAT Resource Group, and select “Access Control (IAM).” Under the “Contributor” role, copy the name of the DevOps organization and the project name.
Navigate to the PROD Resource Group and go to “Access Control (IAM).” In the access view tab, click the “+ Add” button and select “Add role assignment.” Choose the Contributor role from the dropdown menu and leave “Assign access to” as “User, group, or service principal.” Paste the previously copied name into the search bar and select the service principal. Save.
Now we can complete the PROD stage of the release pipeline. Go back to the “New release pipeline” and hover over the UAT stage. Click on “Clone.”
Rename “Copy of UAT” to “PROD.” The ResourceGroup and DataFactory variables are duplicated, but under the Prod scope. Change their values by replacing “UAT” with “PROD.” Save.
While the Azure Data Factory-CI pipeline is configured to run with every change in adf_publish, now the Release Pipeline needs to be adjusted so that a new release occurs with every change in adf_publish. The change must then automatically apply to the UAT Data Factory. For the PROD Data Factory, a pre-deployment approval is required before applying the DEV and UAT changes.
In the “new release pipeline,” click the “continuous deployment trigger” button to enable it. To adjust the UAT stage conditions for automatic execution, click the “pre-deployment conditions” button on the UAT stage. Make sure to select the “after release” option.
Click on the “pre-deployment conditions” for the PROD stage and configure the trigger to “after stage” with the stage set to UAT. Also enable “pre-deployment approvals” and enter your email. Save.
To test the release pipeline, manually initiate the Azure Data Factory-CI pipeline to activate it. Go to Pipelines and select Azure Data Factory – CI. Click on “run pipeline” at the top, then click “run” again. Go to “Releases,” and you should now see the first release. You will also see that the UAT stage of the Release Pipeline is running.
Once the UAT stage is successfully completed, the PROD stage is ready for approval. Go to your UAT Data Factory and verify if the “Wait Pipeline 1” is present.
Go to your “New release pipeline” and click on the PROD stage. Approve. You can see the progress of the PROD stage and the presence of the “Wait Pipeline 1.”
Finally, you can make changes in the DEV Data Factory to observe the entire process from start to finish. Go to the DEV Data Factory, create a pipeline called “Wait Pipeline 2,” and insert a “Wait 2” activity. Delete the “Wait Pipeline 1.”
Click on “save all” and “publish” all changes. In “Pipelines” on Azure DevOps, you can see that the Azure Data Factory-CI pipeline has already been triggered since adf_publish has changed. Similarly, in “Releases,” “Release-2” has been created, and the UAT stage is being deployed.
The Data Factory PROD is currently on “Release-1.” Approve the PROD stage. It is evident that the changes made in the Data Factory DEV are also applied to the UAT and PROD Data Factories!
This confirms that all resources are correctly connected and that the pipelines are functioning properly. Any future deployments in the DEV Data Factory can be replicated across UAT and PROD.
Thus, you will avoid minor differences between environments and save time troubleshooting issues. Feel free to review the generated YAML code throughout the steps of this guide to understand its structure and content.
How to master Azure DevOps?
Azure DevOps is widely used by DevOps teams. To learn to master this cloud service and its various elements like Data Factories, you can choose DataScientest.
Our distance learning courses teach you how to master the best cloud and DevOps tools, as well as the best practices and working methods. By the end of the program, you will have all the skills of a DevOps engineer.
Similarly, our Data Engineer training covers all aspects of data engineering. You will learn programming in Python, CI/CD, databases, Big Data, as well as automation and deployment techniques.
All our programs are available as Continuing Education or in BootCamp mode and offer hands-on learning through a capstone project. You can also obtain top cloud and DevOps certifications.
Our organization, the leading French-speaking provider of Data Science training, is recognized by the State and eligible for Personal Training Account funding. Don’t wait any longer and discover DataScientest!
You now know everything about Azure DevOps Pipelines and Data Factory. For more information on the same topic, check out our comprehensive DevOps guide and our guide on Microsoft Azure cloud.


