Formerly known as PIL, Pillow is an open source library specifically designed for image processing via Python. A veritable goldmine for image file manipulation, let's take a look at some of the basic features of this benchmark library.
What is Pillow, the Python library?
Originally designed by Fredrik Lundh in 1995, Python Imaging Library abbreviated PIL was the reference library for image processing on Python. Abandoned in 2009, the project’s source code was taken over by Alex Clark, who published a new version called Pillow in 2010, definitively replacing PIL.
Unlike other libraries offering only a few image processing methods, Pillow is almost exclusively focused on image processing. It is therefore far more comprehensive and optimized for image manipulation.
For this reason, Pillow is regularly used in the key stages of a computer vision or video processing project, despite the existence of more general libraries such as OpenCV or MoviePy.
In all, no fewer than 30 image formats are supported by this module. These include the usual JPG, PNG, JPEG and GIF files, as well as more specific extensions such as BLP (used by the famous game World of Warcraft), DDS (also prolific in the video game industry) and FITS (used in astronomy).
One of Pillow’s main attractions is its ease of use. Notations are natural, and the underlying classes and methods have been well thought out to facilitate the user experience. It’s this user-friendly aspect that we’re going to highlight in this introductory article. The aim is to present a series of methods that you will come to use, from the simplest to the slightly more sophisticated.
The Image class at the heart of Pillow
Importing an image into Python
Within this vast library lies a class soberly entitled Image. It contains a whole collection of essential methods for getting started with image processing. Let’s take a look at a very basic example below:
The first step is to import the Image class from the PIL module. Rather than importing the entire Pillow library, it’s a good idea to add only those elements that are relevant to our project.
Next, we declare an im variable of type Image via the open() method. To keep things simple, we’ve stored the image file logoDST.jpg in the new variable.

The third line displays some of the file properties available in the class attributes: format, size and mode (grayscale, RGB, CMYK…) and finally, the last line displays the image in question. Note that on an .ipynb file (Jupyter Notebook), this line must be replaced by display(im) in order to display the image in question!
Change format and create a thumbnail
As with any image processing library worthy of the name, you can modify the nature of your :
This snippet converts a file into JPG format. To specify a particular format, you need to mention it in the second parameter of the save() function. An application of this principle can be seen in the next snippet, which creates a thumbnail for the .JPEG file.
Finally, it is also possible to recognize the format of a file with the following command:
Transform an image in no time
As mentioned in Part 1, Pillow’s main strength lies in its wide range of transformation functions and their ease of use.
To illustrate this point, we’re going to perform a series of transformations on a source image.
Below, we have visualized the effect of 5 basic transformations on a source image (called “Original”).
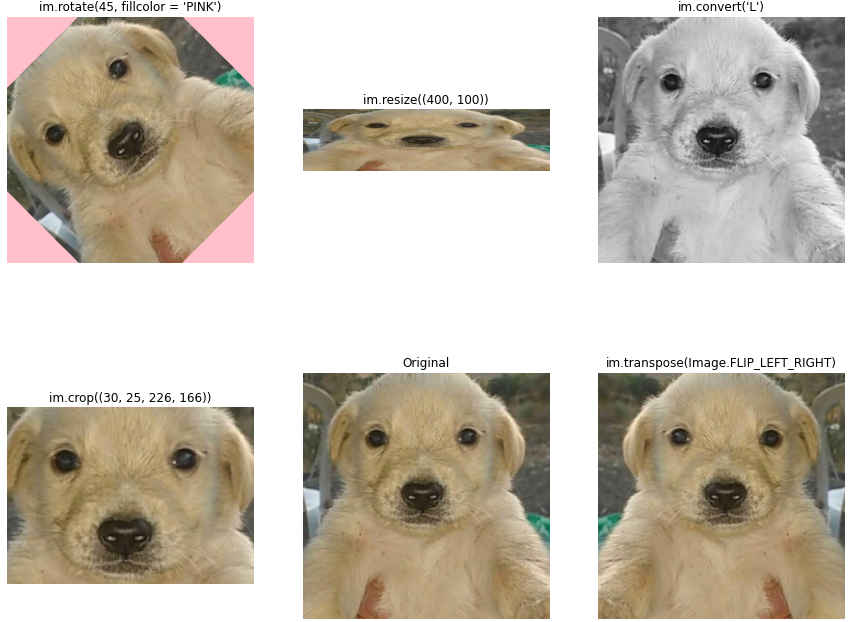
Each figure is associated with the one and only line of code required to recreate the image displayed. So, for example, im.convert(“L”) converts the image mode to grayscale, and just as simply, we can cropper, transpose, resize or rotate an image.
Photo retouching with ImageEnhance
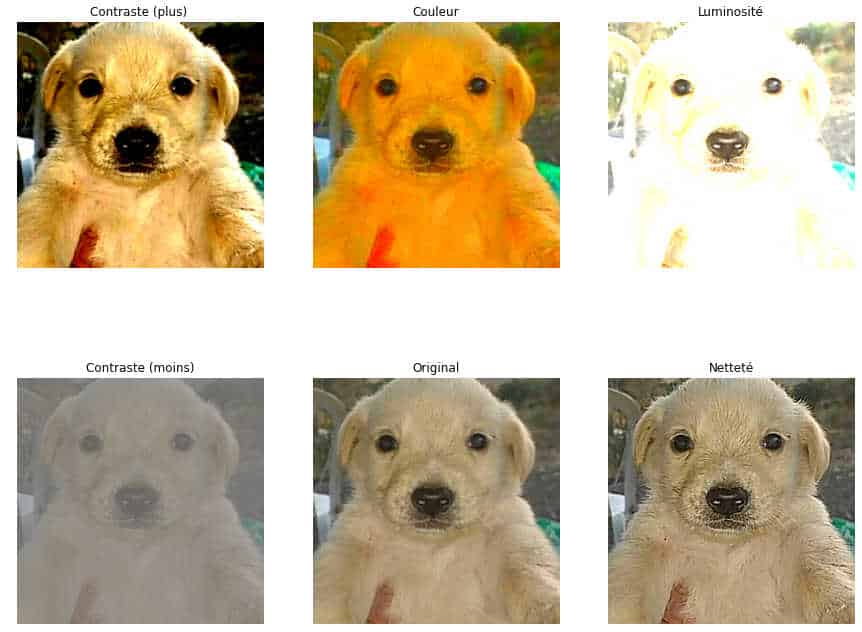
The ImageEnhance module contains four classes for controlling the parameters most commonly used in photographic retouching: sharpness, white balance, contrast and brightness.
Each of these classes contains a single method called enhance(), taking as parameter a numerical value corresponding to the enhancement factor: expressed as a ratio, a parameter set to 1.0 will simply return a carbon copy of the input image.
Contrast defines the relative scale of difference between light and dark parts of an image. Color balance adjusts color intensity according to lighting conditions. Luminosity impacts the overall clarity of the image, unlike contrast. Finally, sharpness defines the fineness of detail in an image.
You’ll be able to retouch your photos in just a few lines!
ImageFilter - a first step in Computer Vision
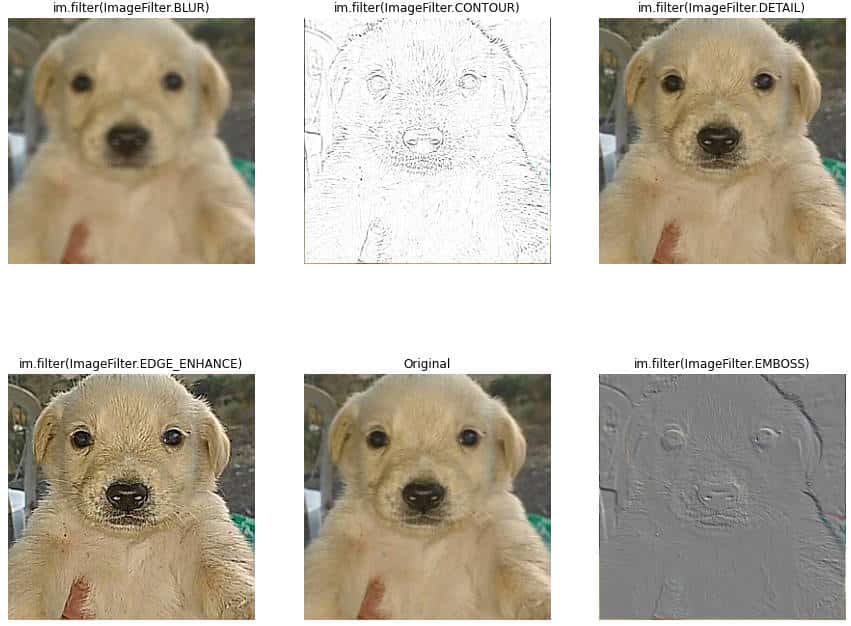
If you’d like to continue your computer vision adventure, Pillow and the ImageFilter module are an excellent gateway to this attractive world. This is where you’ll find Gaussian blurring, detail enhancement and embossing operations. Many Computer Vision algorithms require this type of filtering, especially for edge detection.
To find out more about the basics of Computer Vision, please consult our dedicated article.
And much, much more!
If you’ve enjoyed this introduction to the PIL library, you’ll be pleased to know that this article has only scratched the surface of some of its features! It is indeed possible to add complexity to your image processing by, for example, creating custom shapes and merging different images…