While Power Query offers a multitude of functions, some are not directly accessible from the ribbon. This is precisely the case with the CONCATENATE function, which allows you to merge several columns. So how do you use CONCATENATE in Power Query? That's what we're going to look at in this article.
What is the CONCATENATE function in Power Query?
The CONCATENATE function in Power Query lets you merge text and/or numeric columns. One of the most common examples is last name and first name.
Whatever columns you wish to merge, here’s how to do it:
- load the data into the query editor by going to the “Data” tab, then select “from table or range” ;
- check the columns you wish to merge:
click on “Add Column”, then on “Customize Columns” ; - specify the name of the new column;
in the “Column customization formula” section, you can write in M language. - In other words, use the CONCATENATE formula in Power Query. This takes the form =[column 1]&””&[column 2] ;
click on “OK”, “Close” and “Apply”.
Your two columns have merged.
					let
   Variablename = expression,
   #"Variable name" = expression2
in
   Variablename
How do I use the "Merge columns" in Power Query function ?
If you don’t want to use a formula, you can also merge columns using a specific function.
Here again, the procedure is very simple:
- load the data into the query editor by going to the “Data” tab, then select “from table or range” ;
- select the columns you wish to merge;
click on “Add Column”, then on “Merge Columns”. - select the separator from the drop-down list.
- You can choose a space, a dash, a comma… between the two data sets;
specify the name of the new column;
click on “OK”.
A new column then appears in your query editor.
Good to know: The CONCATENATE function in Power Query does not overwrite existing columns, which are therefore still present in your table. If, for example, it’s the first and last name, you could have 3 columns with this information.
This can be a bit redundant. So if you want to remove them, you can always use the query editor’s transformation tools.
The "Column from example" function
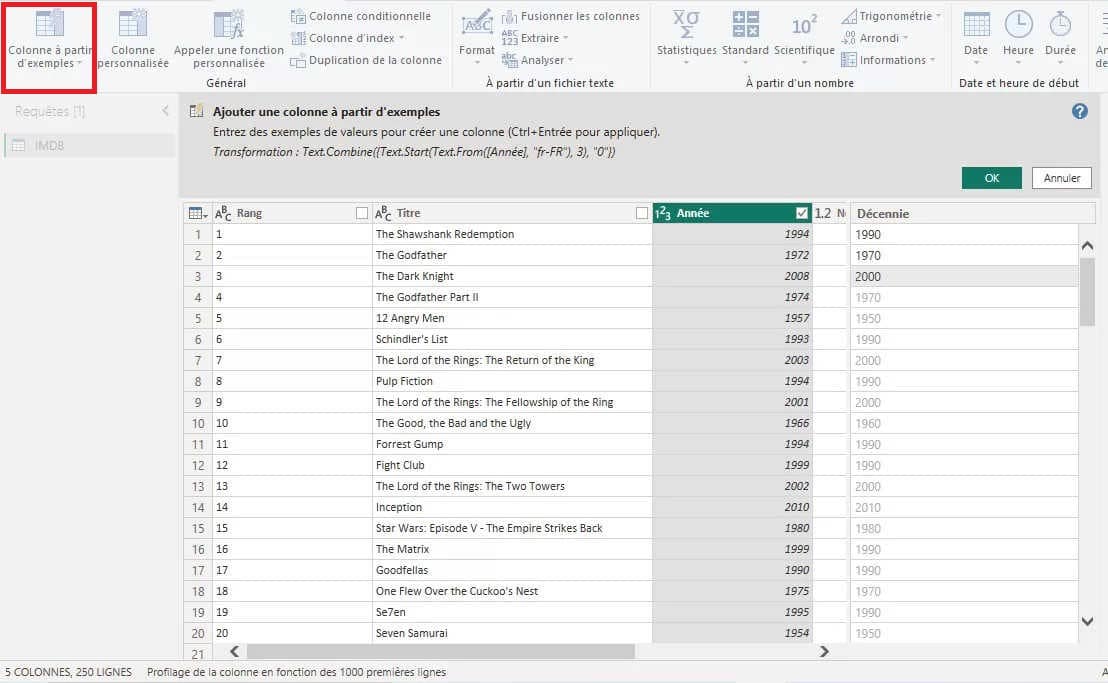
You can concatenate two columns in Power Query using the “Column from example” function.
The idea is to create a new column in an existing table by specifying a template. To do this, you have two options:
- From all columns: Power Query identifies a template for all table columns.
- From a selection: Power Query identifies a template for selected columns only.

Whichever option you choose, the procedure is as follows:
- load the data into the query editor by going to the “Data” tab, then select “from table or range” ;
- select the columns you wish to merge:
- click on “Add Column”, then on “Column from example” ;
- click on the drop-down list and select “From selection” ;
- a “Merge” column appears. Enter the desired result here. If the first name is “Marie” and the last name “Dupond”, you can, for example, write “Marie Dupont”, “Marie.Dupond”, “Marie-Dupond”…
- Depending on how you write it, you’ll see that the M language is automatically written at the top.
- After several tests, select the option that suits you best;
once you’re satisfied with the Power Query preview, click “Ok”.
This option allows you to quickly get a visual result for your columns.
💡 Related articles:
Conclusion
Whichever method you use to implement the CONCATENATE function in Power Query, the result will be essentially the same. But if you’re not familiar with the manipulations described above, it will be difficult to merge cells.
And the same applies to many transformation functions.
In fact, Power Query offers you over 300 of them, and if you want to discover them all, it’s best to learn how to use the tool. That’s why you should take one of our Datascientest training courses.
You’ll learn about data processing, analysis, prediction, modeling and more.


