YAML language allows configuring CI/CD pipelines on Microsoft Azure DevOps in the form of code. Discover why and how to choose this approach, and what its advantages are compared to the classic editor!
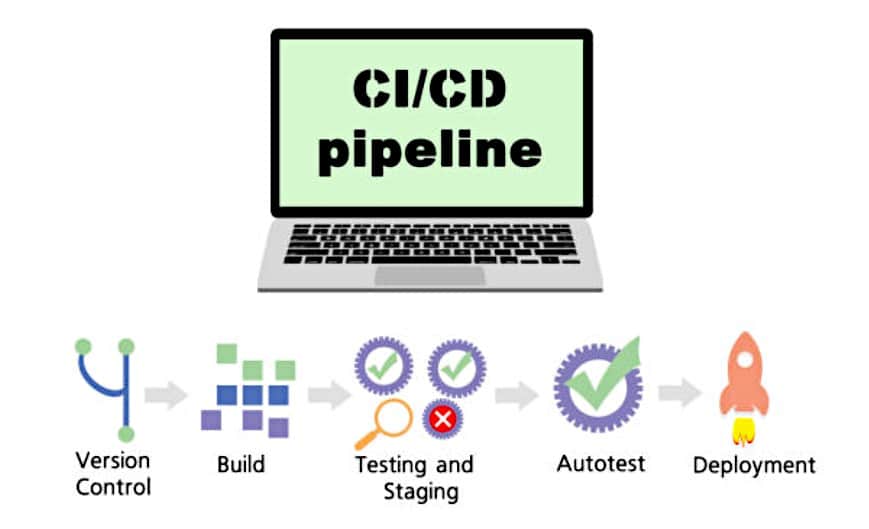
By adding pipelines to its Azure DevOps cloud services, Microsoft has enabled the integration of CI/CD (Continuous Integration and Continuous Delivery) practices into the development process.
However, there are two ways to create an Azure DevOps pipeline. The first method is to use the “classic” tools, and the second is to leverage the new feature of multi-stage YAML pipelines introduced in 2020.
What are the classic pipelines?
Classic pipelines enable Continuous Integration (CI) through Azure DevOps build pipelines. A build pipeline runs before a developer merges code changes into the codebase.
The pipeline can perform tasks such as building, running unit tests, or conducting static code analysis. It can then either accept or reject the new changes based on the results of these tasks.
Continuous Delivery (CD) is achieved through Azure DevOps release pipelines.
After the build pipeline produces an artifact, a release pipeline publishes the artifact to various environments for manual functional testing, user experience testing, and quality assurance.
Once the deployed artifacts have been rigorously tested by testers, the release pipeline can push the artifacts to the production environment.
However, these classic CI/CD pipelines have some drawbacks. First, the tools for creating build and release pipelines do not offer a unified experience.
CI pipelines provide an intuitive graphical user interface for creating and visualizing integration steps and also allow defining the same steps in YAML.
Release pipelines also offer a graphical interface for creating and visualizing pipeline steps, but the issue is that this interface is different from the build pipeline’s and does not support YAML definitions.
What are multi-stage pipelines?
To address this issue, Microsoft introduced multi-stage pipelines. Available since 2020, these pipelines allow an engineer to define build, release, or hybrid pipelines in a single YAML document.
In addition to the advantage of a unified development experience, YAML offers numerous benefits over classic pipelines, both for builds and releases.
YAML definitions are directly version-controlled, providing the same advantages to developers that version control has offered for decades.
What is YAML ?
YAML is a data serialization language often used for writing configuration files. Its name stands for “Yet Another Markup Language.”
This programming language is popular because it is easy to understand and human-readable. It can also be used in conjunction with other languages. Its flexibility and accessibility are its main strengths.
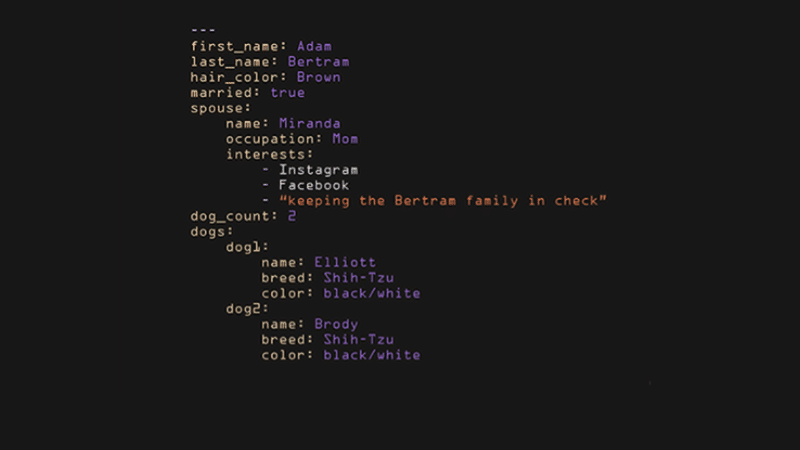
YAML incorporates features from various languages like Perl, C, XML, and HTML. It also uses indentation in a style similar to Python to indicate nesting. Tab characters are not allowed; instead, spaces are used for indentation.
There are no usual formatting symbols like parentheses or quotes. YAML files have the extensions .yml or .yaml, and their structure is either a map or a list.
Maps allow associating key-value pairs. Each key must be unique, but the order doesn’t matter. A YAML map must be indented correctly before it can be closed, and a new map is created by increasing the indentation level or closing the previous map to start an adjacent one.
A list contains values in a specific order and can contain any number of required elements. A list sequence starts with a dash (-) and a space, and indentation separates it from its parent. It can be likened to a Python list or a Bash or Perl array. A list can be embedded within a map.
YAML also utilizes scalars: arbitrary Unicode-encoded data that can be used as values, such as strings, integers, or dates.
In addition to simplifying the writing of more understandable configuration files compared to JSON, YAML is commonly used by Ansible Playbooks for orchestrating IT processes and for Kubernetes deployments.
The benefits of YAML pipelines
One of the main advantages of YAML pipelines is the ability to review every change made to the pipeline since its creation, thanks to the version control system’s history.
It’s also possible to compare a malfunctioning definition with the last known working definition. This helps resolve issues in the build more efficiently and reduces recovery time.
Similarly, it can be useful to see who submitted the buggy code causing the failure and who approved the pull request. This allows team members to collaborate on finding the best way to fix the problem while ensuring that the initial goals are met.
Another strength is that work items help understand why changes were made. By attaching a user story to each contribution to the pipeline, there’s no need to remember the reasoning behind a specific modification.
Furthermore, if a pipeline change causes issues like misconfigurations in the quality assurance environment, you can simply roll back to the last known working version. Your QA environment will be restored within minutes.
The true advantage of YAML is enabling developers to have both the application, infrastructure, and build and release pipelines all as code in a single version control repository. This provides a comprehensive snapshot of the system for any previous point in time.
By checking out an old version of the repository, you can easily clone the environment, run the same pipelines, and deploy the code exactly as it was. This is a highly valuable feature.
Additionally, sharing or duplicating a pipeline is as simple as copying and pasting. It’s just plain text, which can even be sent via email to a colleague if needed for reuse.
CI/CD pipelines are extensive and complex, and changes made to the same YAML file by multiple engineers can lead to conflicts. Fortunately, version control platforms solve this problem by providing intuitive tools to merge conflicting changes. YAML definitions thus allow multiple engineers to work on the same file concurrently.
Just like with application code, peer review is important for pipelines. With the ability to submit a pull request before making new changes, team members can ensure that these modifications have the desired effect.
Finally, branching allows creating a new branch to try unconventional ideas. You can trigger a pipeline run from this branch and discard it if the idea proves unsuccessful.
The introduction of text-based pipeline definitions that can be version-controlled brings advantages over classic definitions based on a graphical interface. This is particularly relevant for large organizations, which would do well to consider YAML for their next Azure DevOps pipeline implementation.

Conventional pipelines VS YAML: a comparison
Classic Pipelines are configured using a graphical user interface by selecting options from the provided choices. This applies to both build and release pipelines.
On the other hand, YAML pipelines are configured using code in a YAML file. The Azure DevOps task assistant can help you find the required tasks and add them to the YAML file.
It is entirely possible to build and deploy an application using classic pipelines. However, YAML pipelines enable deployment to different environments.
YAML pipelines simplify collaboration and make it easier to change multiple values simultaneously. For example, you can use the search and replace feature of an IDE to find and replace multiple occurrences of the same value.
A version control tool like Git also makes it easy to compare changes. Since the pipeline is in a YAML file in the repository, you can restore an old version of the pipeline along with an old version of the code repository.
YAML has become the default choice for building pipelines on Azure DevOps, and most CI/CD tools are compatible with this language. Additionally, container jobs are exclusive to YAML pipelines.
However, this approach may require more time and effort than classic pipelines. Nevertheless, the task assistant is a valuable aid, and it’s possible to export an existing classic pipeline as YAML, although some adjustments may be needed.
Another drawback is that some configurations cannot be changed in the file. You need to make changes using the graphical user interface, and finding the option can be challenging the first time.
Finally, some CD features available for release pipelines are not yet available for YAML pipelines. However, Microsoft is gradually adding new features.
On the other hand, classic pipelines are intuitive and user-friendly. It’s also very easy to explore the different options by navigating the interface with your mouse, without having to consult documentation. However, it’s no longer the default option for building pipelines for Azure DevOps.
In conclusion, the choice between classic and YAML pipelines depends on your needs. Consider how the pipelines will be triggered, on which environments the application will be deployed, how branching strategy works, and how it affects the deployment flow.
You should also know whether you need a single CI/CD pipeline or two separate pipelines. Make sure to understand your workflow and requirements.

How to create a CI/CD pipeline in YAML on Azure DevOps?
To create a CI/CD pipeline in YAML on Azure DevOps, start by connecting to a Microsoft Azure account to use Azure DevOps and Azure Pipelines.
Create a Team Project based on Basic, Agile, Scrum, or CMMI, and then create a build pipeline. You’ll need to provide the source code and the credentials to connect to it, which could be a GitHub repository, for example.
After adding the repository, you’ll receive template suggestions based on different languages like Java or .Net. Choose a template, save the YAML file (.yml), and enable the build. You can add as many steps and jobs as needed to the pipeline.
The next step is to add a release definition and deploy the web application to Azure Web App Service. In the “Releases” tab, select “New pipeline” and choose the App Service Deployment template.
You must have an Azure Web App Service to deploy the application to. If not, create a new one from the Azure Portal.
To complete the deployment, it’s essential to publish the artifacts created in the build. This requires adding a task to the YAML file to publish the artifacts at the end.
Edit the build definition, go to the end of the YAML file, look for the build artifact publishing option, and click “Add.” Save the build and execute it so that the artifacts can be published and used for the release.
You need to provide the build from which the artifacts come for any release definition. Therefore, configure the Azure App Service task in the release definition and allow the task to use the service created with your Azure account. Save the release definition and create a release. Once the deployment is complete, you should see the deployed application.
Next, edit the build definition to enable the continuous integration and continuous deployment switches.
Simply click on the ellipsis button and select the switches. Enable and save the switches for the release definition, and make changes in GitHub to ensure both switches work as expected. Save the pipeline.
You can then customize the build pipeline by adding tasks or modifying existing tasks as needed. You can also add variables and jobs as necessary.
How to become an Azure DevOps expert
Building pipelines in YAML is just one of the many intricacies of Azure DevOps. To master this platform, you can turn to DataScientest.
Our Data Engineer training program allows you to explore data engineering techniques and tools, including Python programming, CI/CD, databases, Big Data, Machine Learning, automation, and deployment.
We also offer a certification program for Microsoft Azure cloud, enabling you to obtain the AZ-104 Microsoft Azure Administrator and DP-203 Engineering on Microsoft certifications. These two paths complement each other in just five days.
All our training programs are conducted entirely online, either in intensive BootCamp mode or as part of Continuous Training. Our organization is recognized by the government and eligible for the Personal Training Account (CPF) or the Bildungsgutschein for financing. Discover DataScientest!


